AI 风口已来,手摸手带你入门AI开发!

7 分钟
2022-07-22
最近更新于: 2022-07-22 00:00:00
在使用 ChatGPT 过程中,大家不可避免的会遇到这些问题
- 如何在国内使用ChatGPT?
- 如何搭建代理服务器?
- 如何自定义私有 GPT?
- 如何开发一个知识库?
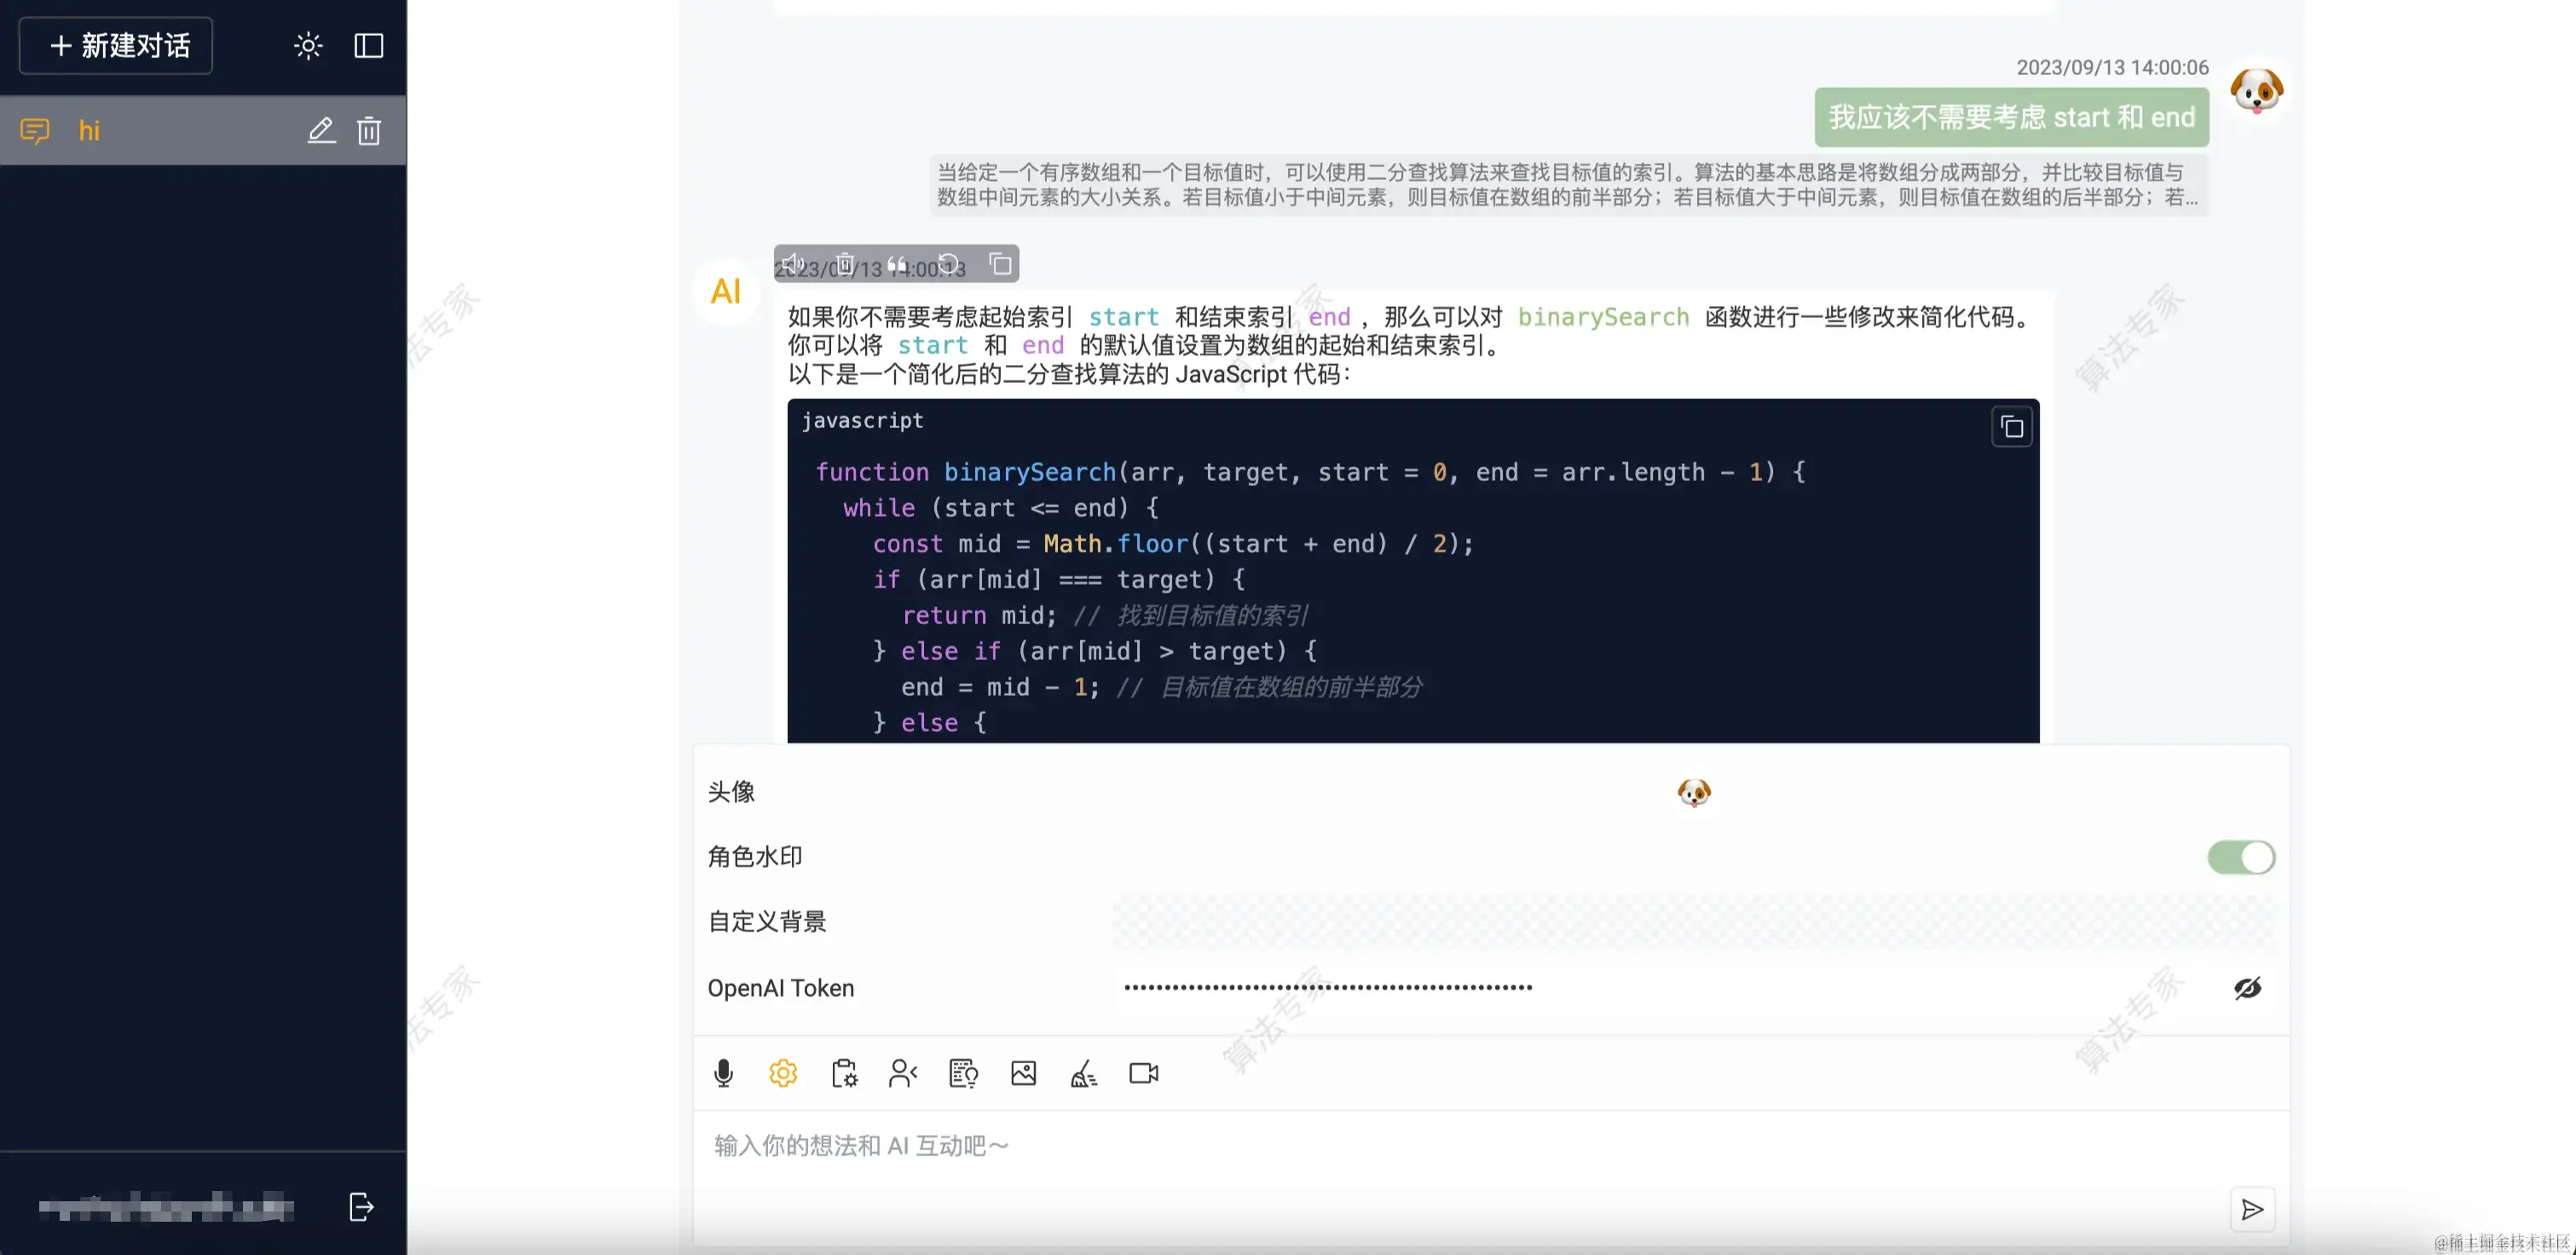
接下来我将手摸手带大家进入 AI 世界,最终效果先给 xdm 体验一下
国内使用 ChatGPT
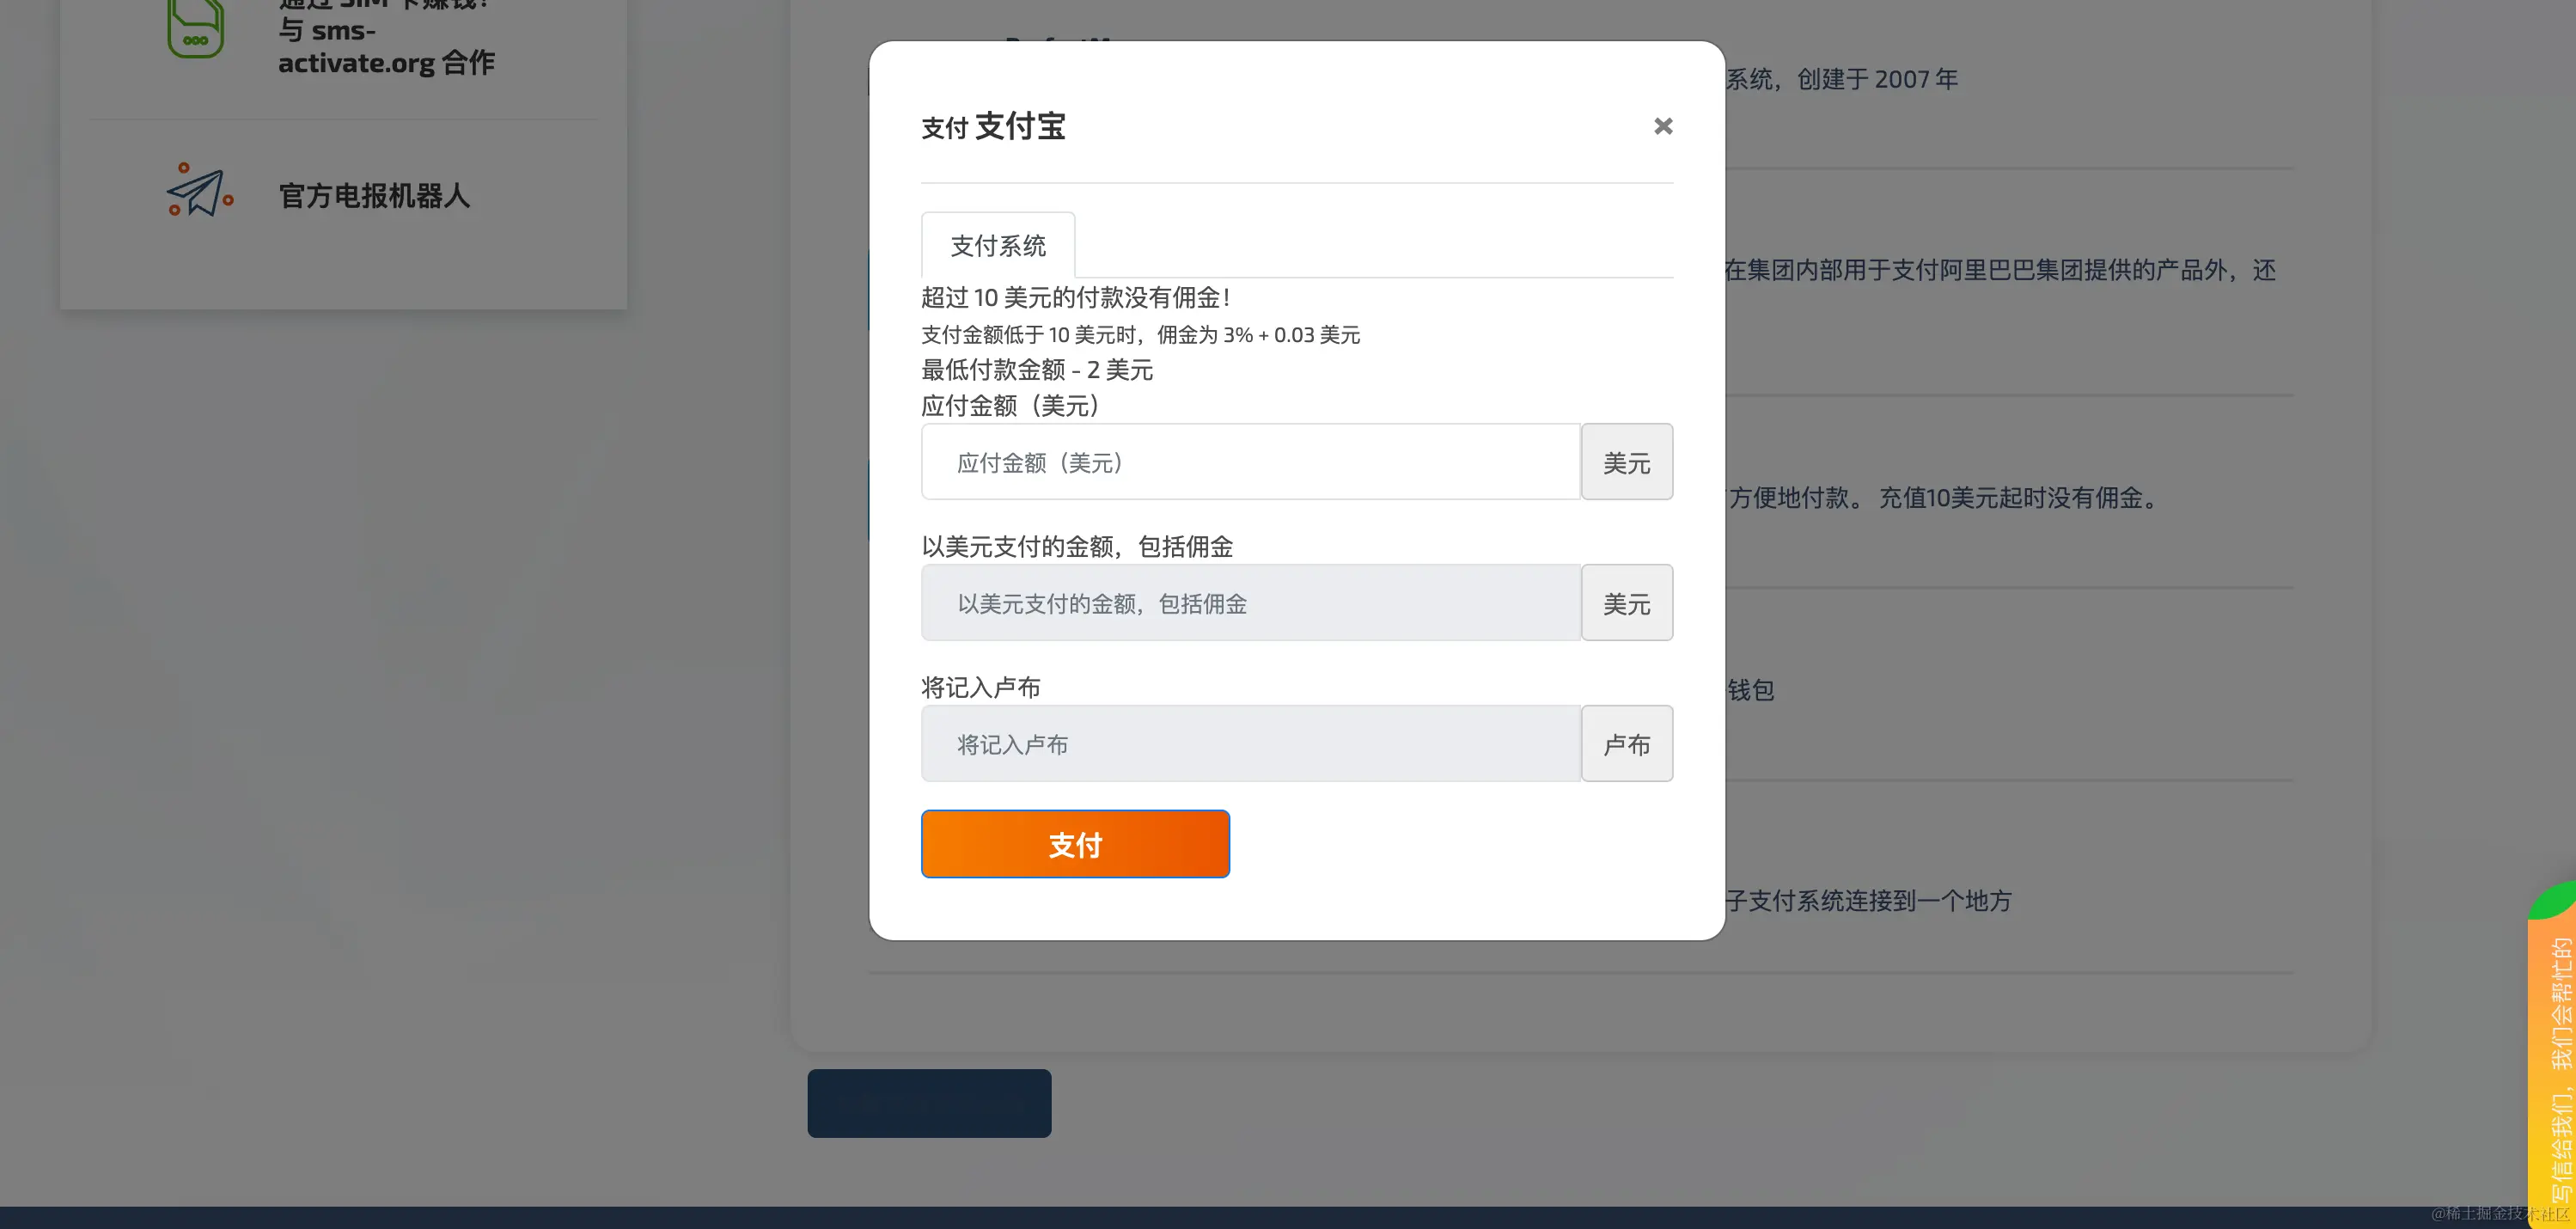
使用 sms-activate
- 充值
- 购买 openai 服务
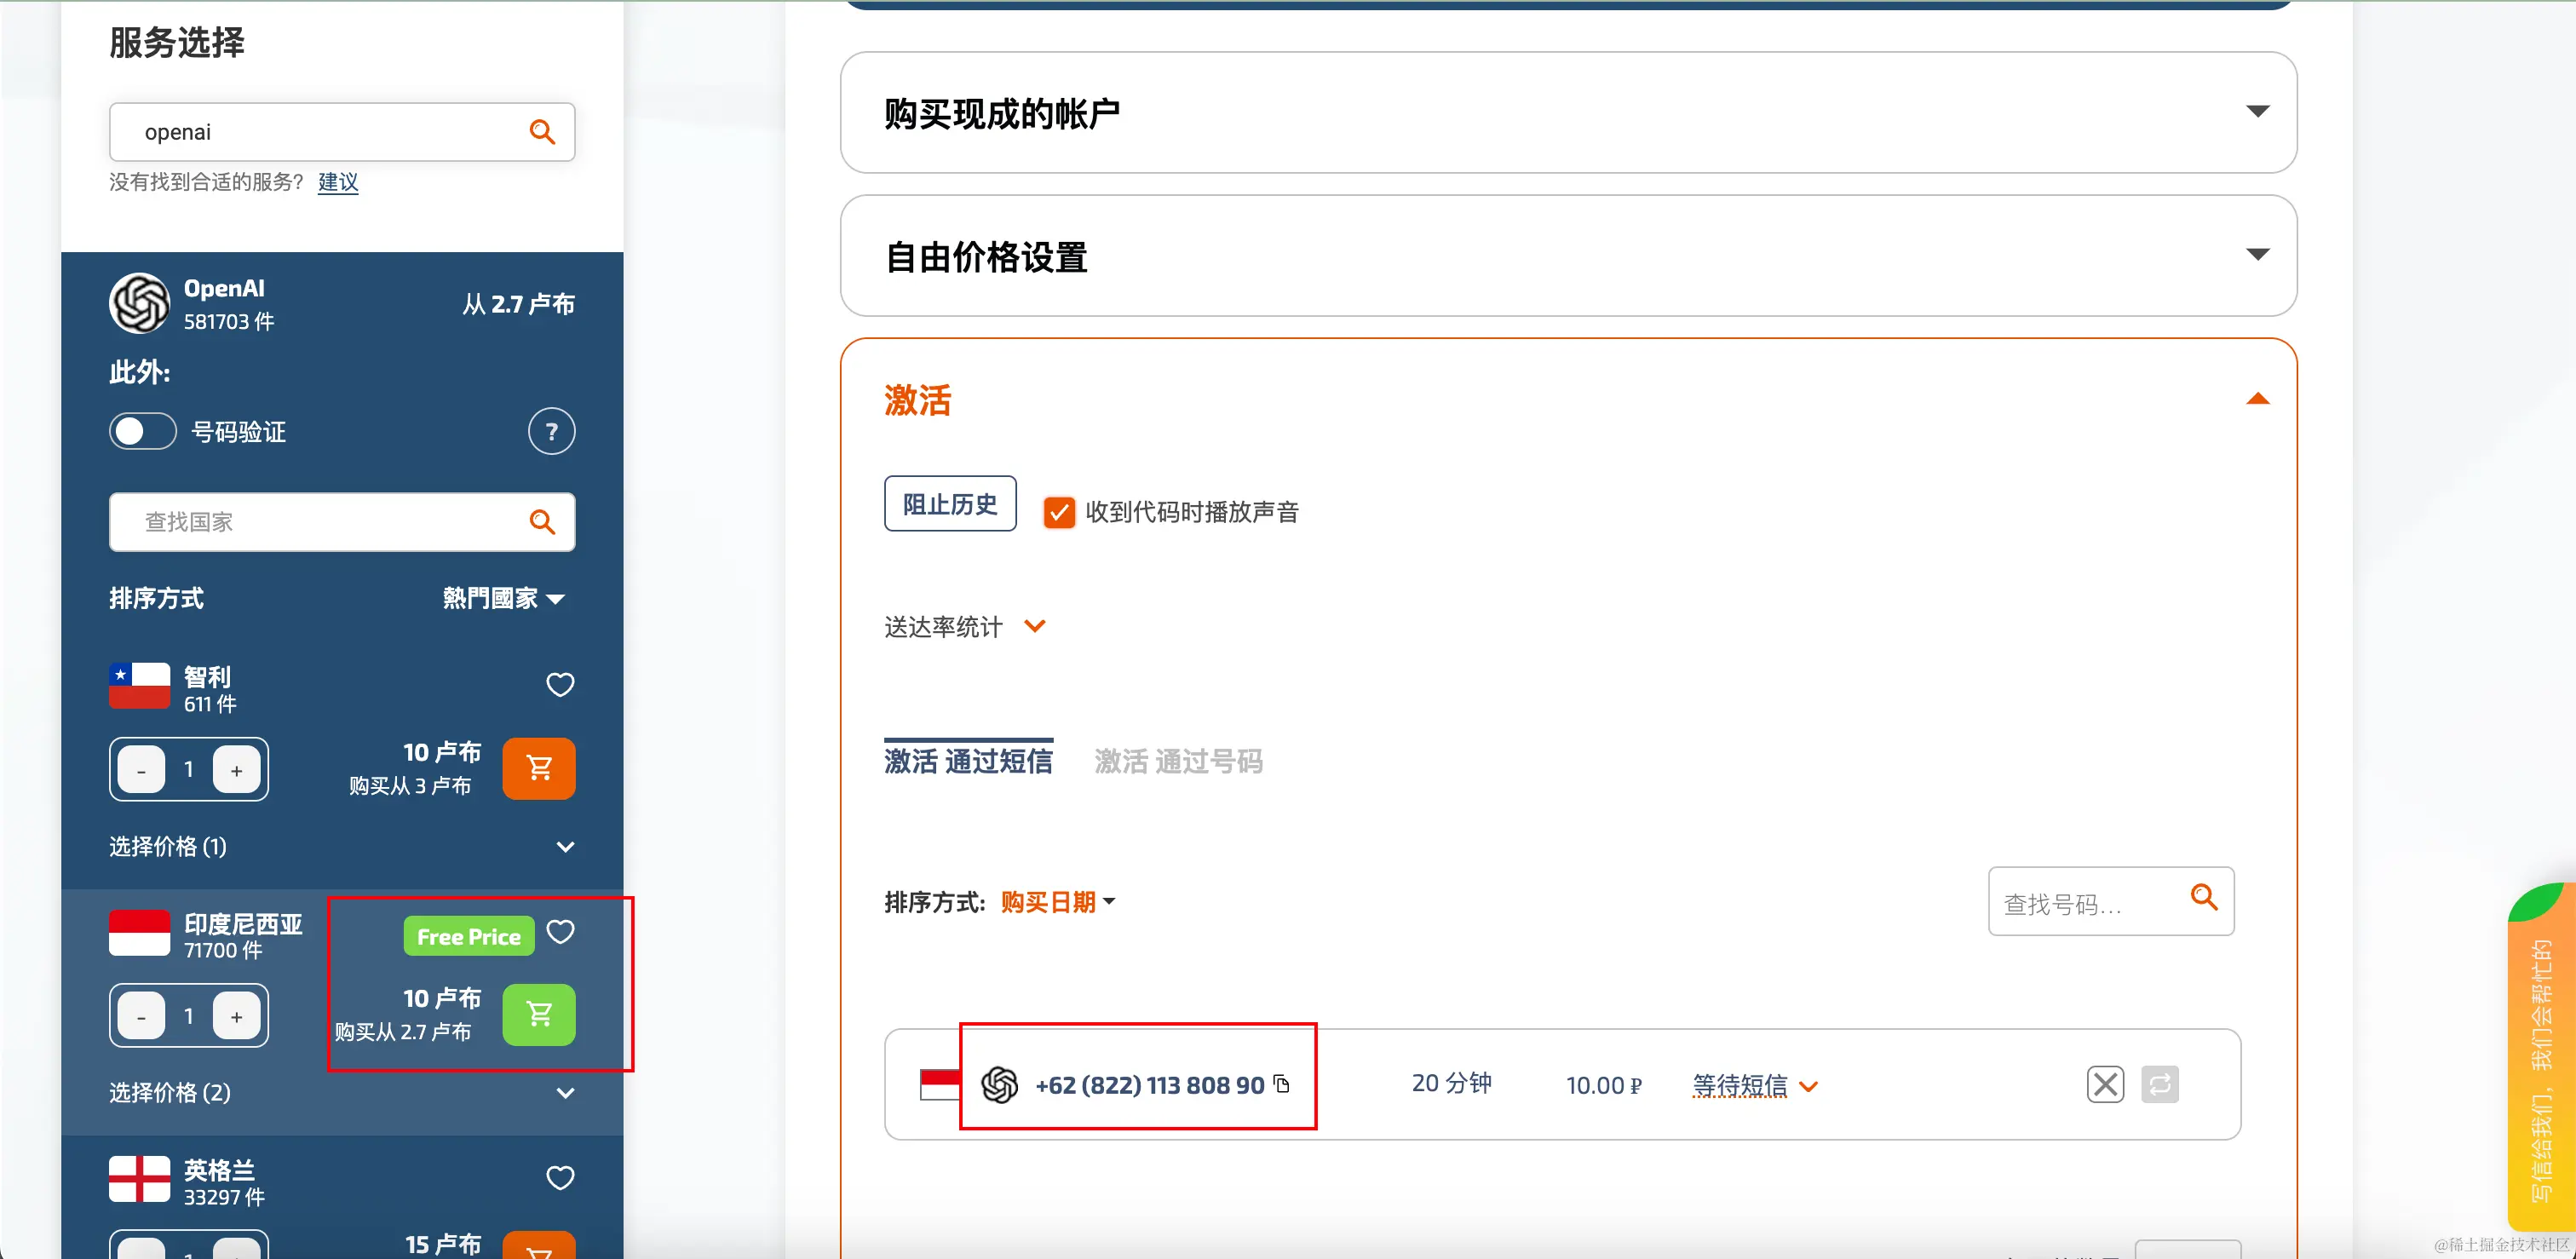
- 注册 openai 账号
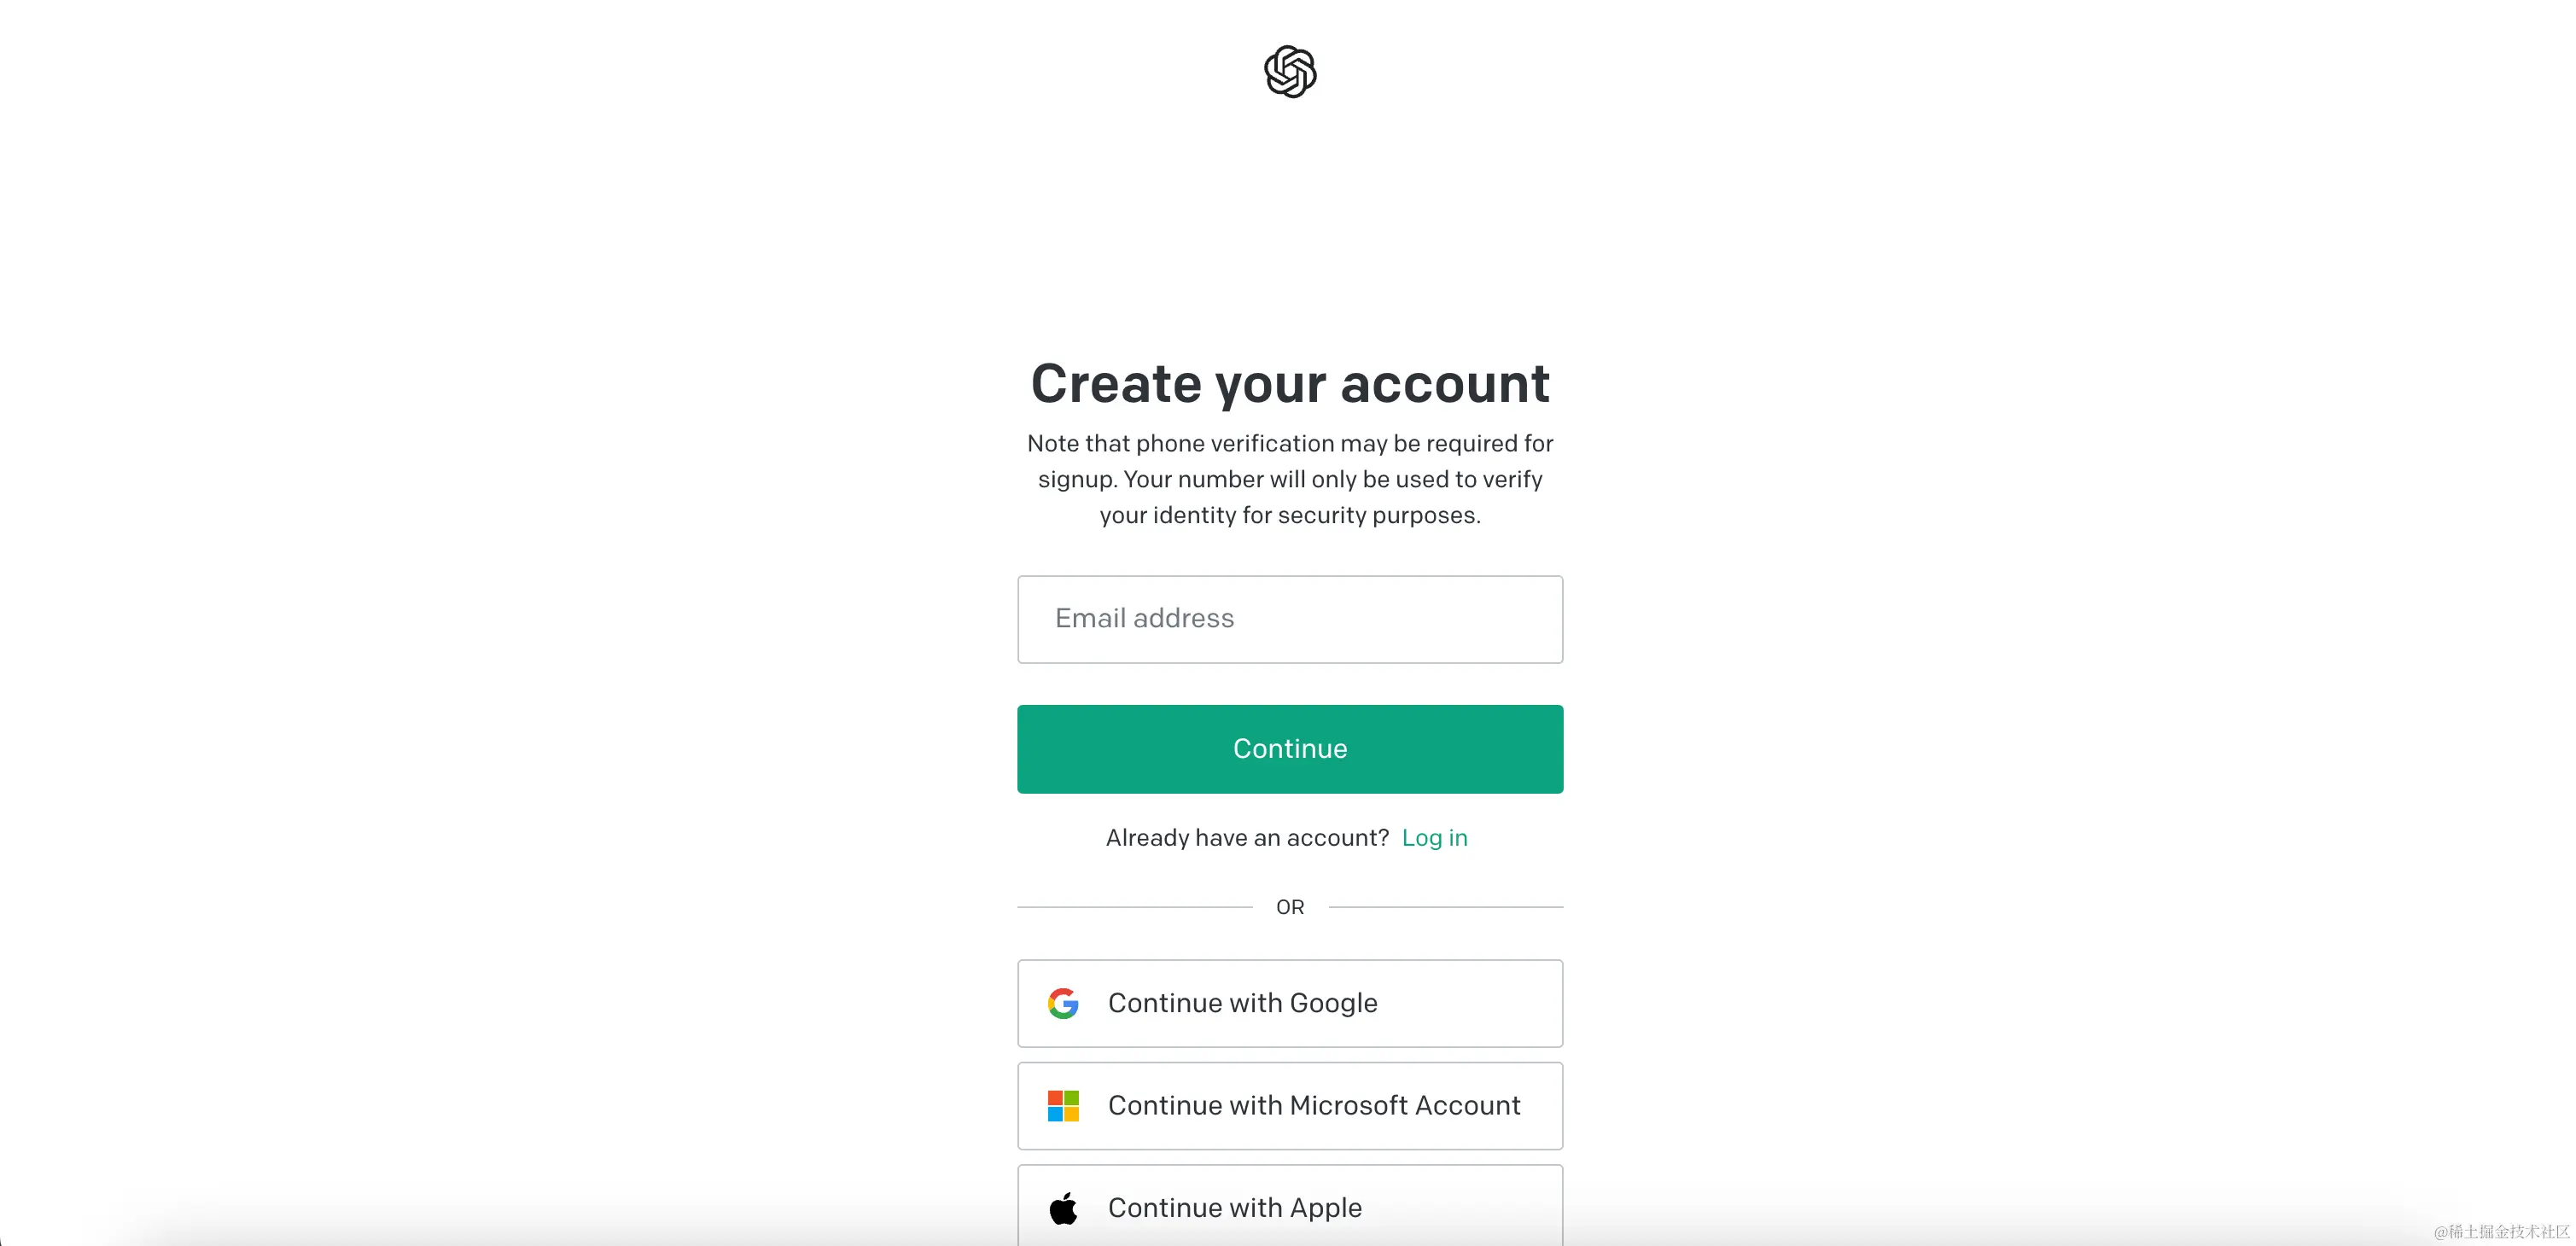
- 号码验证 注册流程有一个号码验证,输入上述号码,等待验证码即可
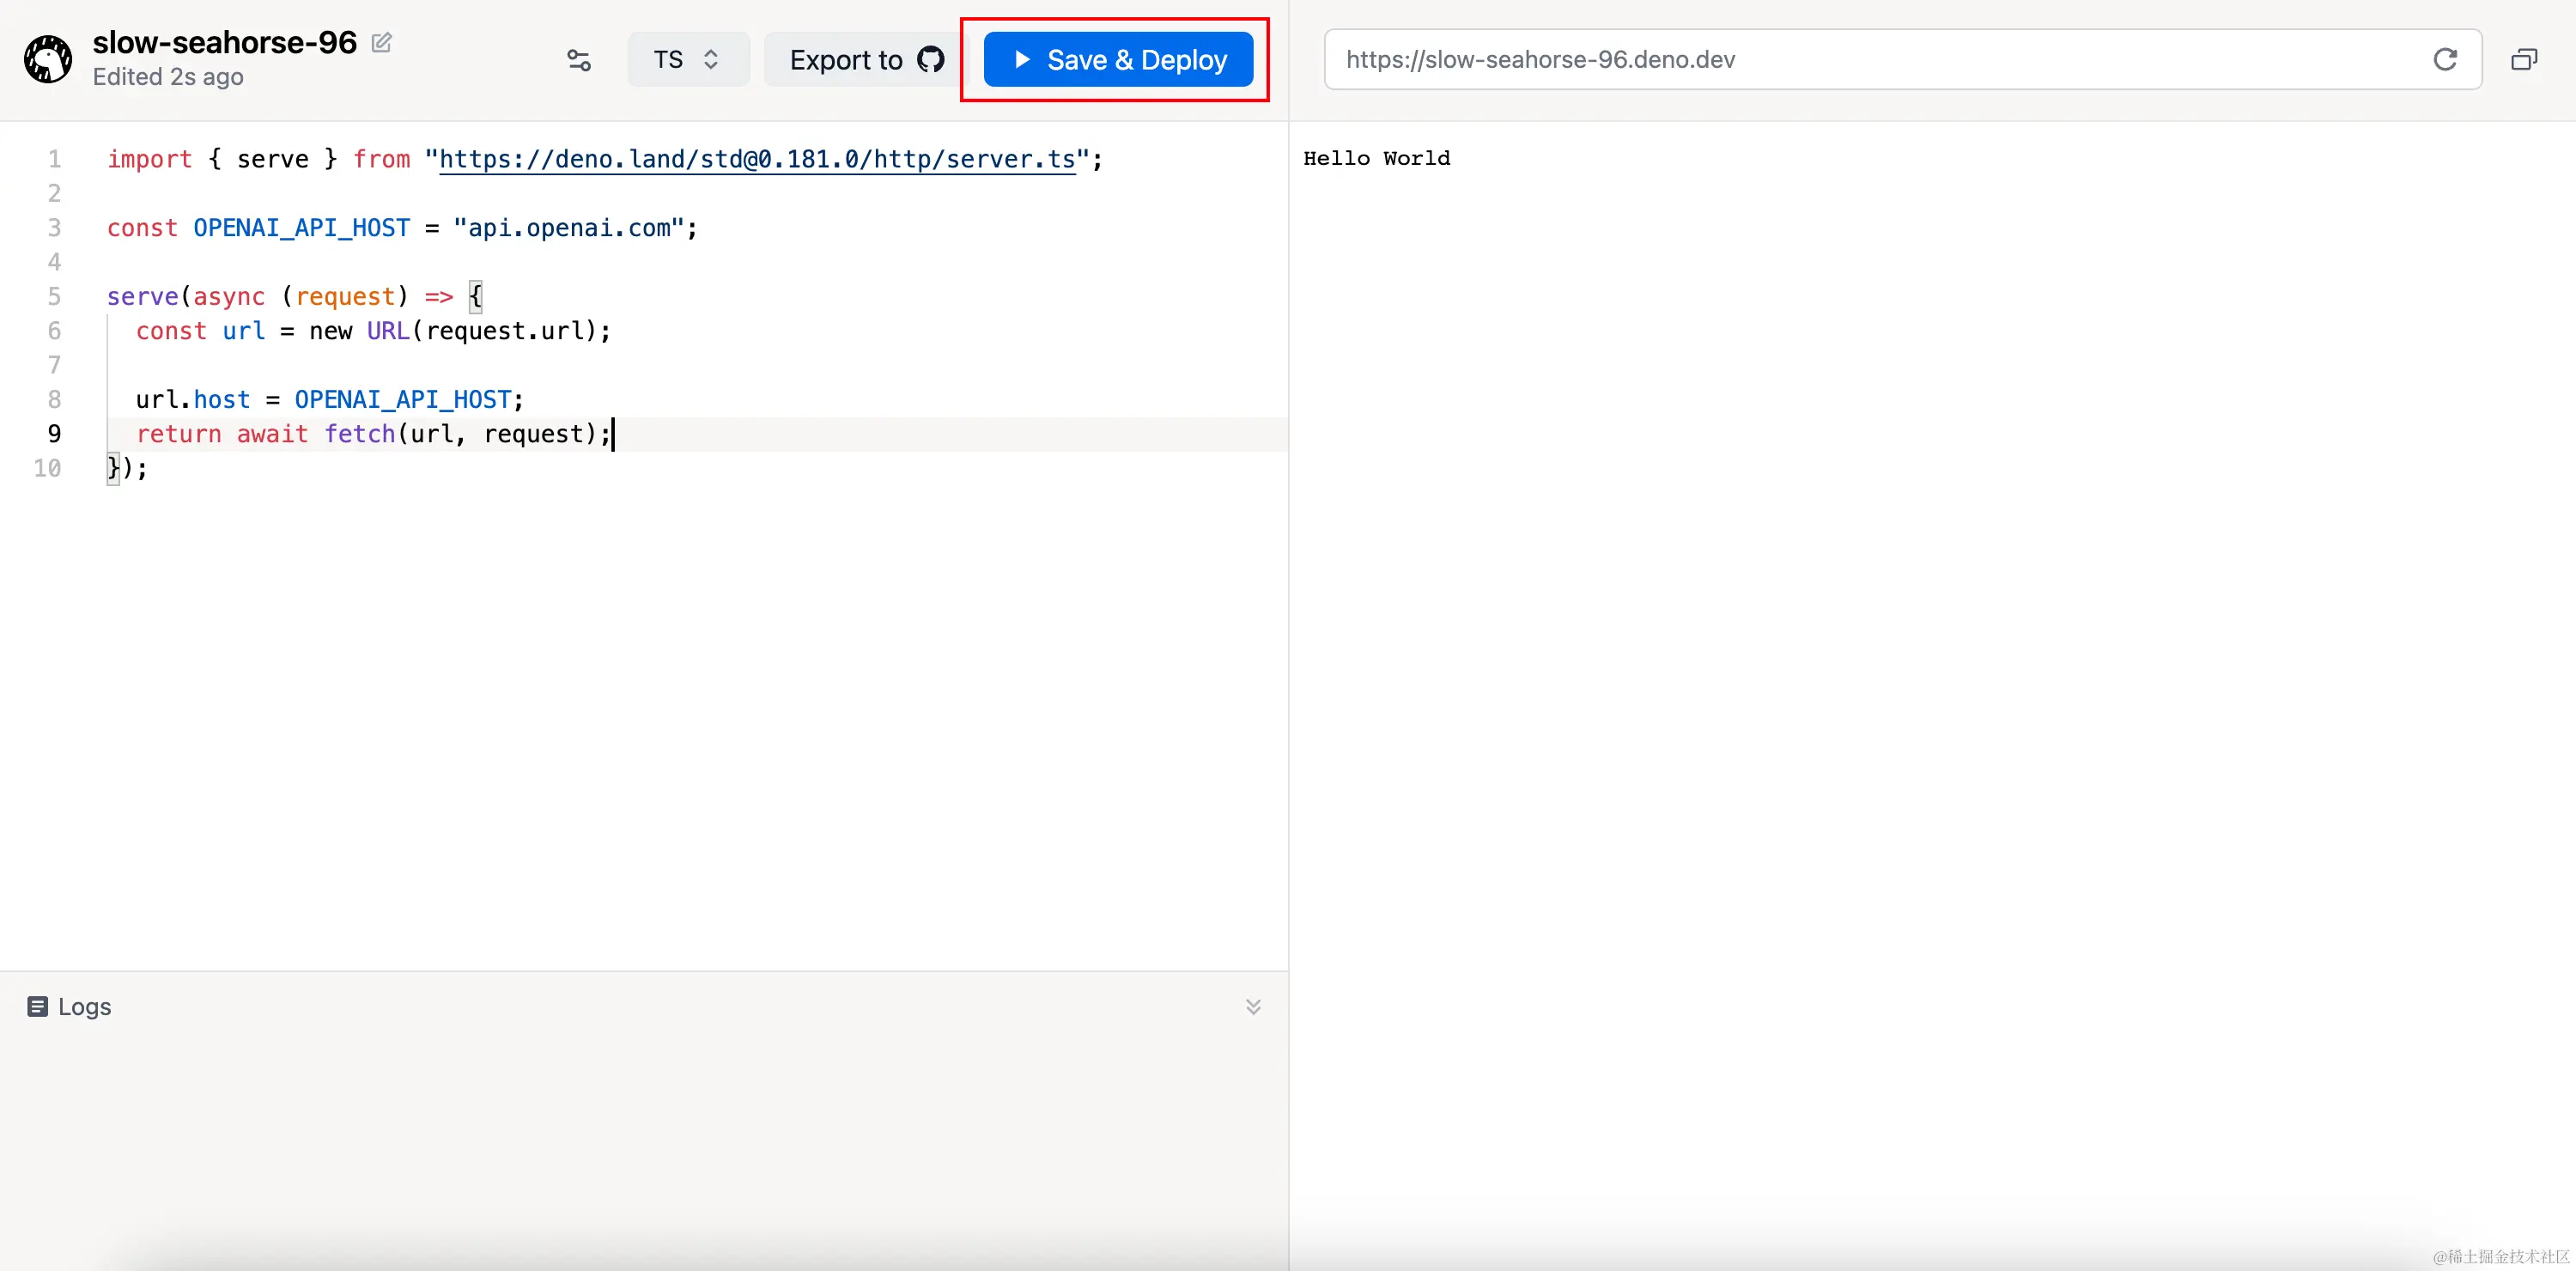
如何搭建开发代理服务器
使用 Deno Deploy,如果嫌麻烦可以使用我的代理:https://proxy.aitimi.cn/
- 创建项目

- 建立代理服务器
const OPENAI_API_HOST = "api.openai.com";
serve(async (request) => { const url = new URL(request.url);
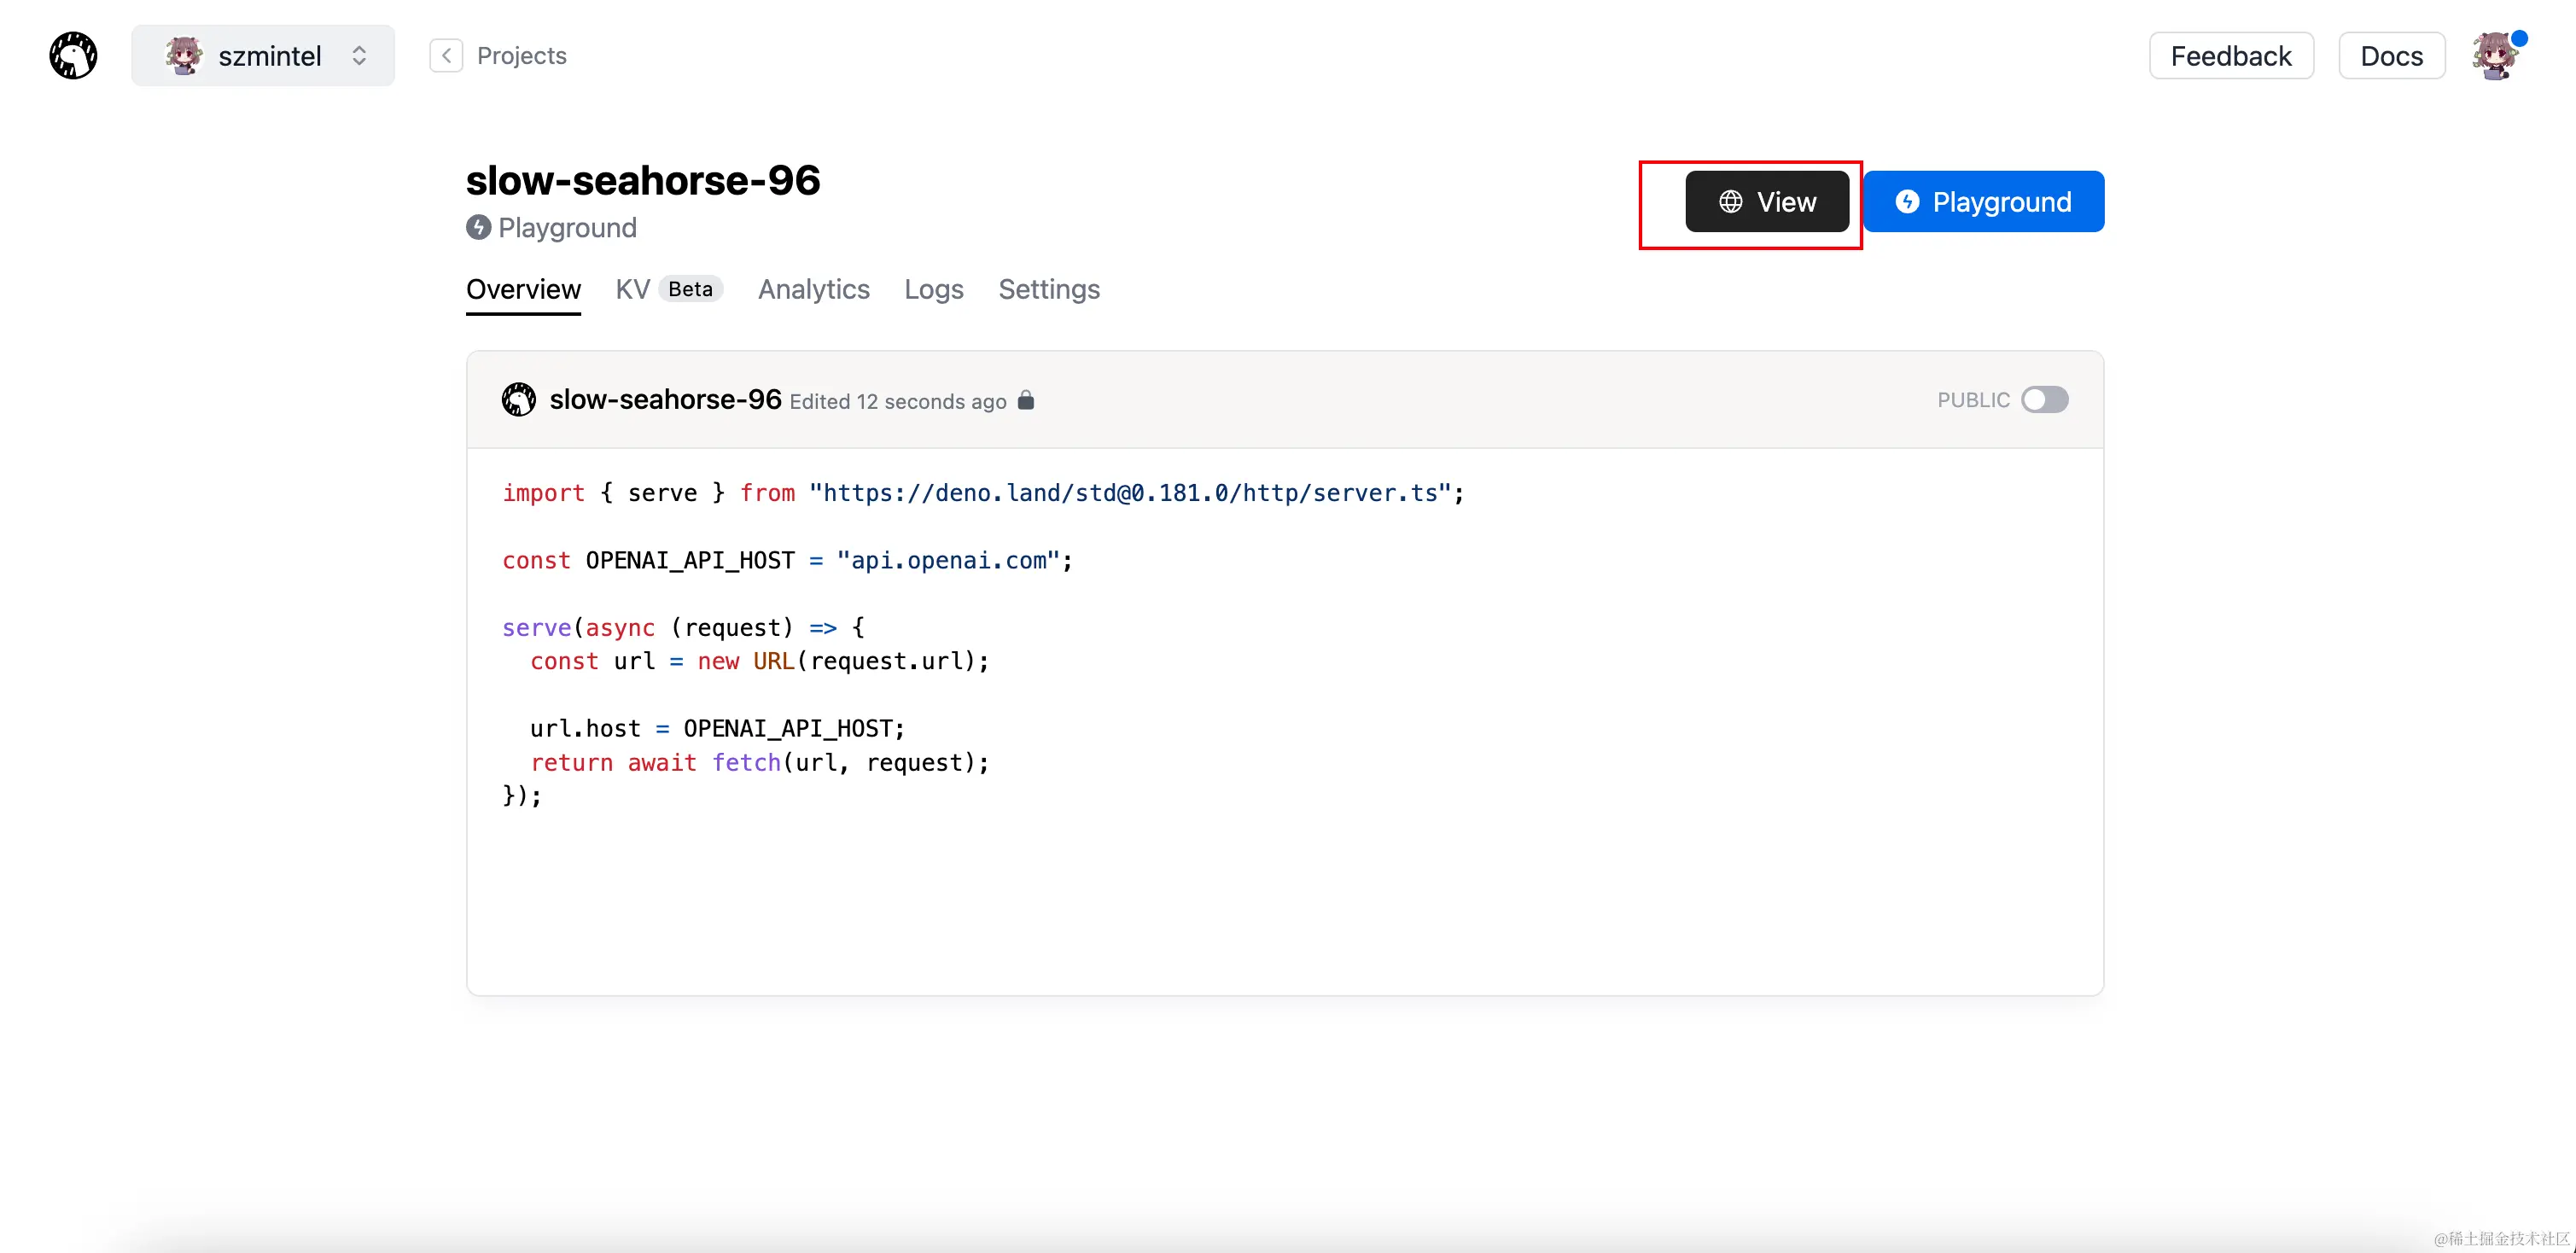
url.host = OPENAI_API_HOST; return await fetch(url, request);});- 托管
- 获取代理
另外你也可以使用 cf workers,代码如下:
export default {  async fetch(request, env) {    try {      const OPENAI_API_HOST = "api.openai.com";      const oldUrl = new URL(request.url);
      if (oldUrl.pathname === "/") {        return new Response(`https://${oldUrl.hostname}/v1`, { status: 200 });      }
      const newUrl = new URL(request.url);      newUrl.hostname = OPENAI_API_HOST;
      const modifiedRequest = new Request(newUrl, {        method: request.method,        headers: request.headers,        body: request.body,      });
      return await fetch(modifiedRequest);    } catch (e) {      return new Response(e.stack, { status: 500 });    }  },};
如何自定义私有 GPT
为了简便,我们直接使用 OpenAI,我们使用前篇的 脚手架 工具快速创建一个 nuxt3 工程:
ucli create ai,等待安装完成,直接进入项目输入pnpm dev 启动即可。
配置代理
我们需要在 .env 中配置代理
PROXY_URL = 'https://proxy.aitimi.cn/v1'在调用时
const opt: Record<string, unknown> = {  timeout: 20 * 1000,  apiKey: '',}if (process.env.PROXY_URL)  opt.baseURL = process.env.PROXY_URL
const openai = new OpenAI(opt)
封装 OpenAI API
在服务端,我们需要对 OpenAI API 进行封装调用:
基础 API 封装
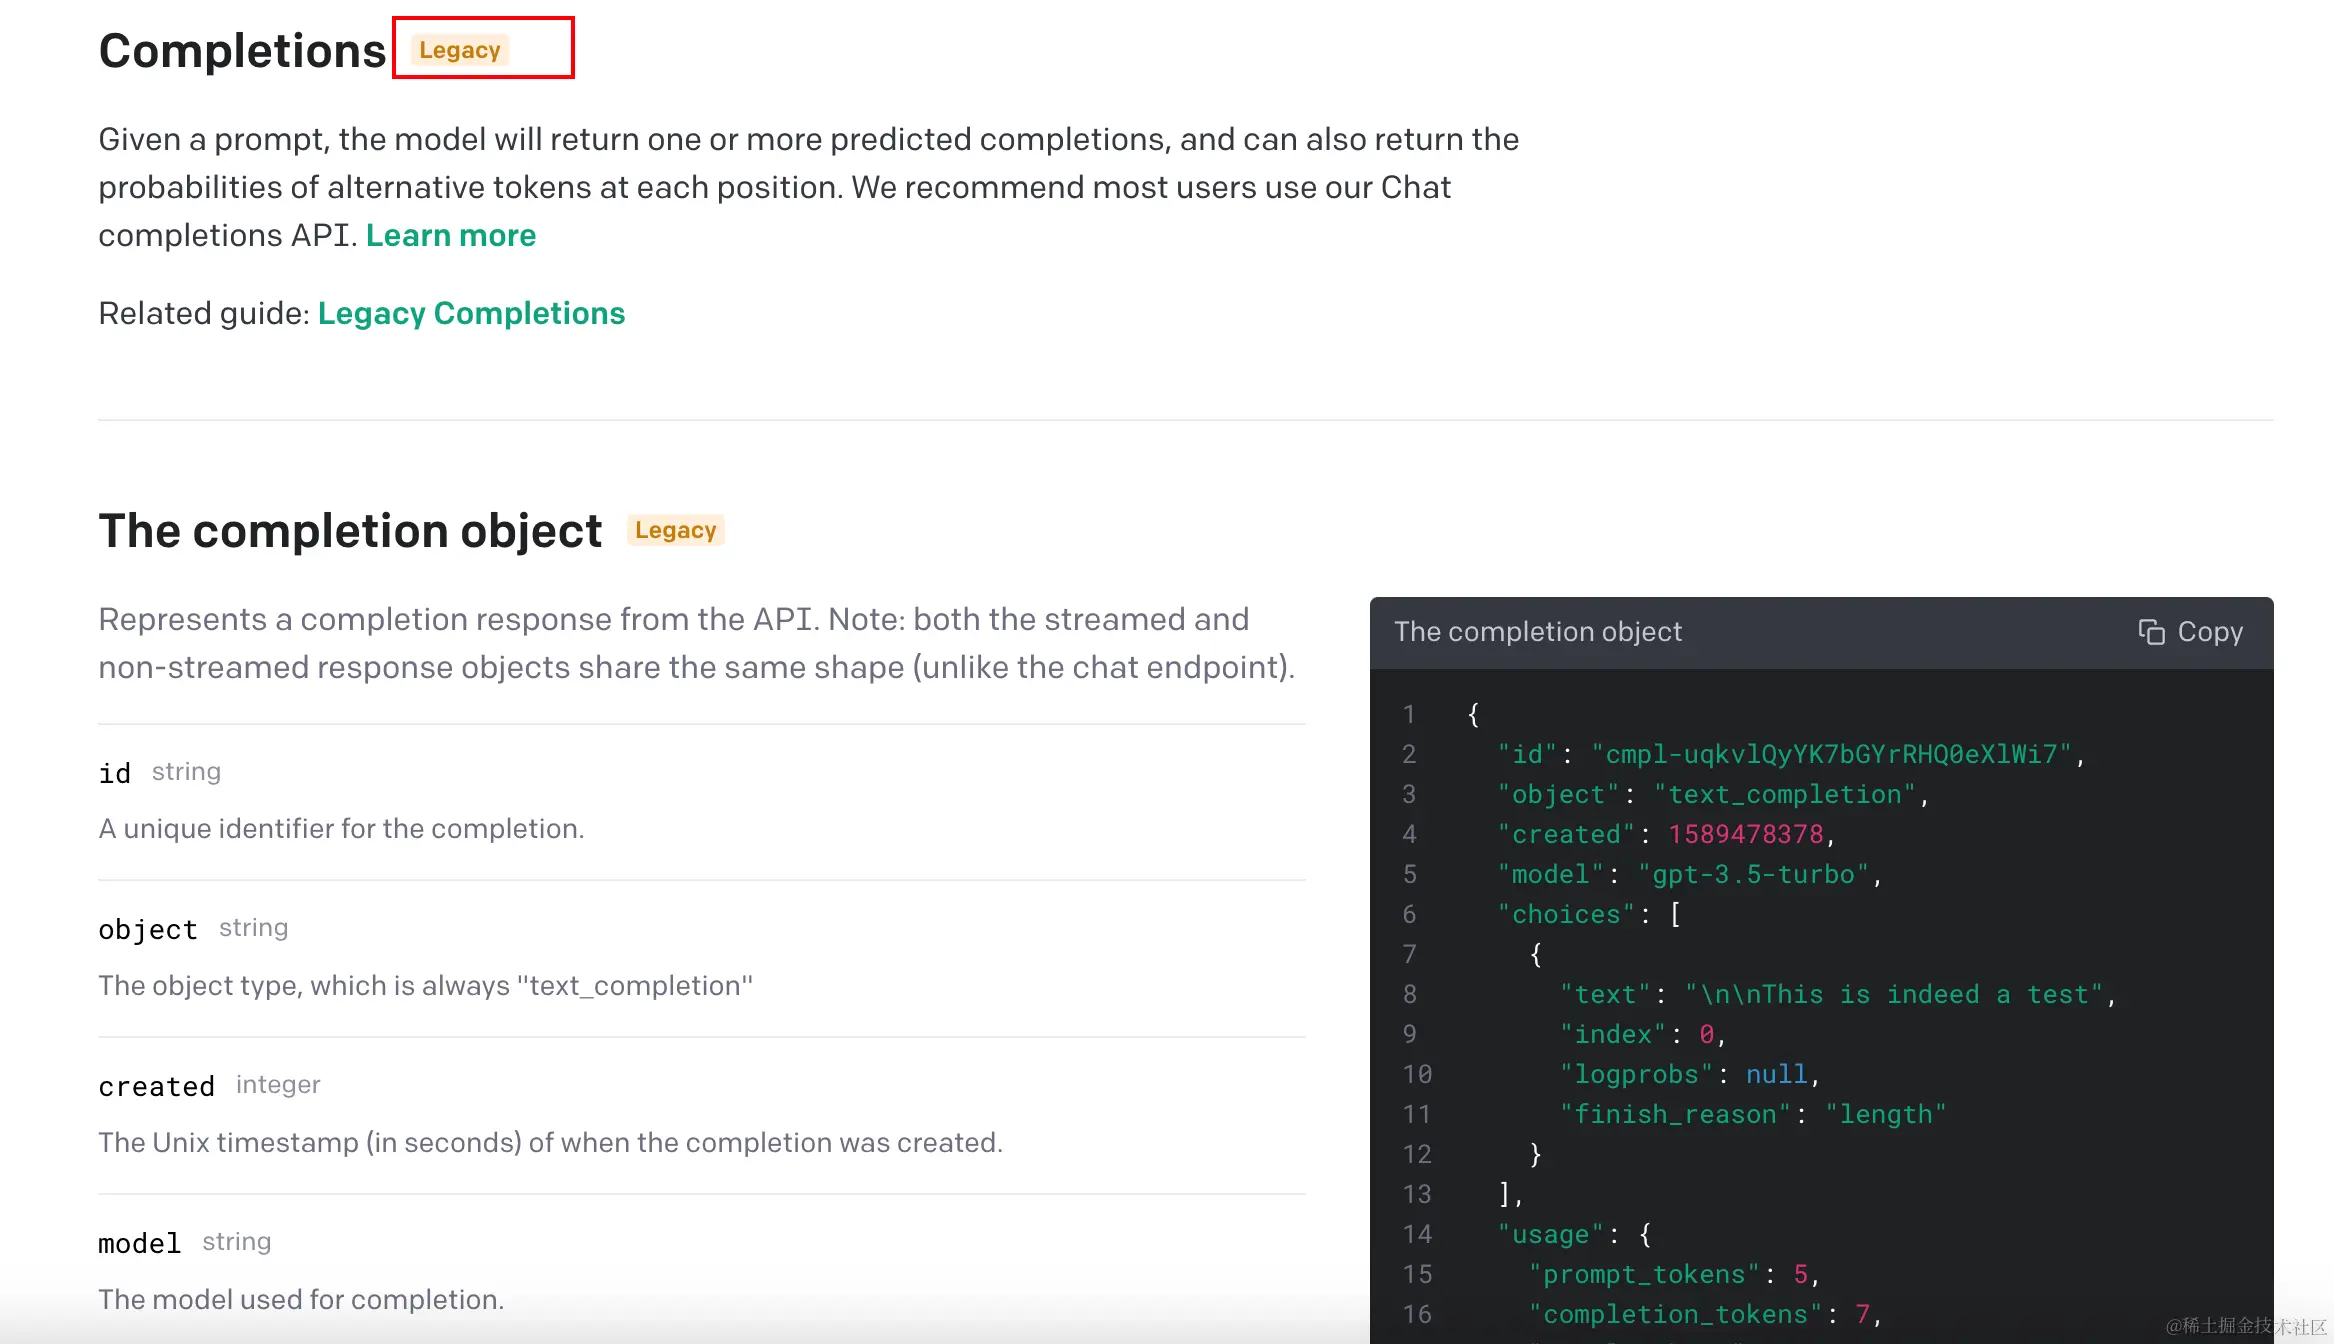
Chat API
对话,另外 Completions API 被标记为兼容,不再推荐,可以使用 Chat API 实现
export async function chat(event: H3Event, messages: IMessage[], conf: IConf) {  const {    model = 'gpt-3.5-turbo',    temperature = 1,    stream = false,    user = '',    token = '',  } = conf  openai.apiKey = token  const list = messages.map((i) => {    return {      role: i.role,      content: i.content,    }  })  const res = await openai.chat.completions.create({    messages: list as any,    model: model as string,    temperature,    stream,    user,  }).catch((error) => {    handleError(error)  })
  if (stream) {    const streamResult = new PassThrough()    for await (const chunk of res as any) {      if (chunk.choices[0].finish_reason === null) {        const content = chunk.choices[0].delta.content        if (content !== undefined && content !== null)          event.node.res.write(content)      }      else {        event.node.res.end()      }    }    return sendStream(event, streamResult)  }  else {    const result = res?.choices?.[0]?.message?.content    return result  }}
Dalle API
图像生成,图像生成后图片做了一个代理,以便客户端可以访问到生成图片
function proxyImage(url?: string) {  const baseURL = 'oaidalleapiprodscus.blob.core.windows.net'  return url?.replace?.(baseURL, process.env.IMAGE_PROXT_URL)}
export async function dalle(prompt: string, conf: IImageConf) {  const {    n = 1,    size = '256x256',    response_format = 'url',    user = '',    type = 'create',    image,    mask,    token = '',  } = conf  openai.apiKey = token  let res  switch (type) {    case 'create':      const res = await openai.images.generate({        prompt,        n,        size,        response_format,        user,      }).catch((error) => {        handleError(error)      })      return proxyImage(res?.data?.[0]?.url || res?.data?.[0]?.b64_json)    case 'edit':      res = await openai.images.edit({        image: image!,        mask,        prompt,        n,        size,        response_format,        user,      }).catch((error) => {        handleError(error)      })      break    case 'variation':      res = await openai.images.createVariation({        image: image!,        n,        size,        response_format,        user,      }).catch((error) => {        handleError(error)      })      break  }  return res}
Embedding API
矢量化
export async function embedding(input: string, conf: IEmbeddingConf) { const { model = 'text-embedding-ada-002', user = '', token = '', } = conf openai.apiKey = token const res = await openai.embeddings.create({ model, input, user, }).catch((error) => { throw error }) return res?.data?.[0]?.embedding}Whisper API
语音转文本
export async function whisper(file: File, prompt: string, conf: IWhisperConf) {  const {    model = 'whisper-1',    response_format = 'json',    temperature = 0,    language = '',    is_translation = false,    token = '',  } = conf  openai.apiKey = token  let res = {}  if (is_translation) {    res = await openai.createTranslation({      file,      prompt,      model,      response_format,      temperature,      language,    }).catch((error) => {      handleError(error)    })  }  else {    res = await openai.audio.transcriptions.create({      file,      prompt,      model,      response_format,      temperature,      language,    }).catch((error) => {      handleError(error)    })  }
  return res}
其他
OpenAI API 还支持 内容安全检查(moderation)、模型微调(finetune),大家自行封装。
NuxtAPI 封装
Chat API
import { ModelValidSchema } from '~/server/schema'
export default defineEventHandler(async (event) => {  const body = await readBody(event)  const { messages, conf } = body  validate(ModelValidSchema, { messages, ...conf })  return await chat(event, messages, conf)})
Dalle API
import { PromptValidSchema } from '~/server/schema'
export default defineEventHandler(async (event) => {  const body = await readBody(event)  const { prompt, conf } = body  validate(PromptValidSchema, { prompt, ...conf })  return await dalle(prompt, conf)})
Embedding API
Embedding API 封装我们会在知识库详细讲解
调用
以 Chat API 为例:
- 使用 Fetch 调用
- 处理流数据
- Markdown 转 HTML
- 输出显示
获取数据
使用 Fetch API 获取接口数据,读取流信息获取生成文本,使用 store 储存 当前生成文本
const { setCurrentMessage } = useSessionStore()
const result = await fetch('/api/chat', {  method: 'POST',  body: JSON.stringify({    messages: client.getMessages(true, list?.value),    conf: Object.assign(client.getConf(), { stream: true, token: getSetting()?.value?.token }),  }),}).catch((error) => {  const item = client.addAssistant(error?.message, MessageType.error)  list?.value?.push(item)})if (!result?.ok) {  try {    const res = await result?.json?.()    if (res) {      const item = client.addAssistant(res?.message || res, MessageType.error)      list?.value?.push(item)    }  }  catch {    const user = client.addAssistant('服务器出错了~', MessageType.error)    list?.value?.push(user)  }  return}const res = result?.bodyif (!res) {  const item = client.addAssistant('AI 没有数据返回', MessageType.error)  list?.value?.push(item)  return}const reader = res.getReader()const decoder = new TextDecoder('utf-8')const user = client.addAssistant('')list?.value?.push(user)let done = false
while (!done) {  const { value, done: readerDone } = await reader.read()  if (value) {    const char = decoder.decode(value)    if (char === '\n' && user?.content?.endsWith('\n'))      continue
    if (char) {      user.content += char      setCurrentMessage(user.content)    }  }  done = readerDone}
Markdown 转 HTML
初始化 Markdown
使用 markdown-it 来转换成 HTML
import MarkdownIt from 'markdown-it'import mdKatex from 'markdown-it-katex'import mdHighlight from 'markdown-it-highlightjs'
const md = MarkdownIt({  linkify: true,  breaks: true,}).use(mdKatex).use(mdHighlight, {  inline: true,})export default md
转换 HTML
import md from '~/utils/markdown'export function renderMarkdown(content: string) { const msg = md.render(content) return msg}使用 Worker 转换 HTML
import MarkdownWorker from './md.worker?worker'
export function renderMarkdownInWorker(content: string): Promise<string> {  if (!content)    return Promise.resolve('')  const id = crypto?.randomUUID?.()  markdownWorker.postMessage({ type: 'markdown', id, payload: content })  return new Promise((resolve) => {    function handler(e: MessageEvent) {      if (e.data.type === 'html-markdown' && e.data.id === id) {        markdownWorker.removeEventListener('message', handler)        resolve(e.data.payload as string)      }    }    markdownWorker.addEventListener('message', handler)  })}
md.worker.ts
import md from '~/utils/markdown'
const sw = globalThissw.addEventListener('message', (event) => {  if (event.data.type === 'markdown' && event.data.payload) {    const msg = md.render(event.data.payload)    sw.postMessage({      type: 'html-markdown',      payload: msg,      id: event.data.id,    })  }})
输出显示
使用 nuxt3 plugin 注入 markdown util
import { renderMarkdownInWorker } from '~/works'import 'highlight.js/styles/atom-one-dark.css'
export default defineNuxtPlugin(() => {  return {    provide: {      renderMarkDown: renderMarkdownInWorker,    },  }})
在 显示组件中调用 markdown util 生成 HTML
import { throttle } from 'lodash-es'const { $renderMarkDown } = useNuxtApp()const content = ref('')const { currentMessage } = storeToRefs(useSessionStore())const throttleRender = throttle((msg: string) => { $renderMarkDown(msg).then((html) => { content.value = html })}, 50)watch(currentMessage, (newVal) => { throttleRender(newVal)})如何开发个人知识库
知识库开发详见 这篇文章
最后
完结撒花🎉,接下来的路,只能大家自己走了😄,希望大家在 AI 这片热土上掘金顺利!